 Add
Add
 Add
Add
 Add
Add

Let me start by saying that I’m not a professional boot fitter, so all opinions are my own. Nevertheless, I am obsessive about my gear, and this is a subject that’s close to my heart.
If I had a pound for every time I’d walked into a ski shop and overheard the boot fitter (a.k.a. sales rep) trying to push a high-performance (read: expensive) pair of ski boots on an unsuspecting first time buyer, I’d be a rich man! It’s for this reason, among others, that I was keen to write this article. But before I start on boot fitting itself, let’s go right back to the source of the problem: gear guides.
Don’t pick your boots based on gear guides!
If you read any of the many gear guides that get released at the beginning of every season, you’d be forgiven for thinking that there are a plethora of different boot options available to you. Sadly, for many people, this is simply not that case. Marketers will do absolutely everything to try to sell you their gear, but the reality is that almost all ski boots are designed for slightly (and sometimes very) differently shaped feet and lower legs.
Take Lange boots, for example. In my experience, they run particularly narrow on the foot - indeed, there’s no way that I could ever comfortably wear their boots (although I have tried on a couple of pairs over the years, just to see). Digging a little deeper, it becomes clear why Lange boots are so narrow: Lange is a North American brand and, generally speaking, North American men have narrower feet than their European counterparts (true fact).
The same can be said of boots made by other North American brands too, such as Full Tilt (soon to shut down, RIP) and K2. That being said, you can’t depend upon this rule, as Head, another North American brand, makes boots which are generally wider.
Atomic is another interesting one. Originally an Austrian brand, their boots are also wider than those North American brands mentioned above. However, from personal experience, I could never ski in Atomic boots, even if they do fit my feet well enough. Why? Because the lower leg just doesn’t conform to the shape of my own lower leg. They clearly work for some people, but definitely don’t for me.
So, what am I trying to say here? The message that I want to get across is that before even thinking about buying your first pair of ski boots, you must appreciate that different boots are designed for different foot shapes and widths, and also for different lower leg shapes. Please ignore the marketing spiel and wise up to this reality. Gear guides are good for only one thing: getting an overview of all the new products that are out there. They should never be used to pre-determine first time ski boot purchases.
“There is, however, a problem - although all brands use this flex rating system, in reality there’s no standardisation between brands, and one brand’s 120 flex could easily be another brand’s 110 flex, or even 100. Therefore, you need to take the different flexes stated by brands with a large pinch of salt.”
Ski boot type - choose wisely
The next thing to realise is that brands offer different types of ski boots. Certain brands, such as Scarpa, specialise in only one type of boot - namely ski touring boots. Other brands such as Salomon, offer the full gamut, from piste boots, to freeride boots, to touring boots, to racing boots. It might seem obvious, but it’s crucial that you buy the correct type of boot not only for your own personal skill level, but also for the kind of skiing that you intend to do. If you fail to do this - for example you think it would be cool to have super stiff racing boots (it’s not cool) - and then you make the purchase, you’ll be in for a shock, as they’ll cause you severe discomfort. You’d be amazed at how many people own the wrong type of ski boots. Don’t be that person!
Ski boot stiffness - be aware of the pitfalls
If the above can be considered the basics, a more complicated issue concerns comparing the stiffness of ski boots from brand to brand, otherwise known as ‘flex’. Adult boot flex is usually measured from around 60 to 130. Roughly speaking, 60 equates to a soft female piste boot, while 130 equates to a stiff male racing or freeride boot. There is, however, a problem - although all brands use this flex rating system, in reality there’s no standardisation between brands, and one brand’s 120 flex could easily be another brand’s 110 flex, or even 100. Therefore, you need to take the different flexes stated by brands with a large pinch of salt.
And, if that isn’t difficult enough, when you try on ski boots in the warmth of the store, the flex that you’ll feel will not be the flex that you’ll experience when you’re skiing. Why? Because it’s cold out there on the mountain! Colder temperatures will always make the plastic in your ski boots stiffer, which in turn will make it more difficult to flex them. Therefore, you mustn’t be deceived into thinking that a pair of stiff 130 flex high-performance piste boots have adequate flex in the store, because I can guarantee you that they’ll feel a lot stiffer on the hill.
At the store - time to buy
Pick a store with a large ski boot department, in fact, the bigger the better - you’ll need as many different brands and boots to choose from as possible.
Enter the store with a completely open mind - who cares if those Tecnica boots that you saw are a colour that might go nicely with your new MGG jacket! Forget all such nonsense, and be prepared to buy only the pair of boots which fits you best, and which is designed for the purpose that you intend to use them.
Go to the store with ample time. You might need to spend a couple of hours trying on different boots (really - it’s a long process), so don’t go during your lunch break.
Try to avoid going at a busy time - a weekday is always preferable. On a Saturday afternoon it’ll be mayhem, and the boot fitters won’t be able to give you enough attention.
Be prepared to spend a fair chunk of change on the correct pair of boots. Of all the different kinds of ski gear that you can buy yourself, your boots are probably the most important element of all.
“If you need to try on 20 different pairs, then try on 20 different pairs! The boot fitter may not thank you for it, but that’s their problem, not yours.”
Once at the store, make yourself known to a boot fitter. Say that you’re not in a rush, that you’re buying your first pair of ski boots, and that you’re prepared to try on as many different boots as it takes. If they instantly go into a sales patter about the latest and greatest boot on their shelf, then you’ll know straight away that you’ve got a dud. If, on the other hand, they first ask you what you intend to use the boots for, and then take a good look at your feet, then you’ve potentially got someone more knowledgeable. It doesn’t really matter which type of boot fitter you encounter, since the most important thing is that you call the shots. It’s you that’ll be wearing these ski boots, and it’s you that’s got to make the decision as to whether they fit your feet and lower legs, not the boot fitter!
But do the boots fit?
It’s then a question of trying on as many different ski boots as possible. If you need to try on 20 different pairs, then try on 20 different pairs! The boot fitter may not thank you for it, but that’s their problem, not yours. Try boots from all the different brands in the store, so that you can get a feel for what they’re like in terms of foot and cuff (upper boot) shape. You may find, like me, that literally only one brand fits you (for me, that’s Head). Or you may find that a few different brands fit you. And yet, what do I actually mean by fit? Because you see, I can squash my foot into all sorts of brands’ boots. And yet the only brand that truly fits me, is Head.
To find a brand / boot which fits you correctly, follow these rules, to the letter - no compromises:
Foot length - When you stand up rod-straight, your longest toe(s) should just touch the front of the boot. When you then get into the ‘action’ (goalkeeper) position, with your legs flexed, your longest toe(s) should pull away from the front of the boot, so that you can no longer feel it.
Foot width (often called ‘foot last’) - Your foot should fit snugly in the boot and not have any wiggle room from side to side, but it shouldn’t feel too squashed or crushed on either side, either. If you can feel pressure points when you stand up and walk around, these aren’t the boots for you.
Foot volume - By this, I mean how much space there is above your foot. When you do up the boots that you’re trying on, you should be able to close the bottom two (or sometimes one) buckles with your little finger - and I really mean that. In other words, the buckles should never be done up particularly tight. With the bottom buckles done up like this, your foot should just touch the upper inside of the boot, leaving you with no wiggle room. If with the bottom buckles done up lightly (i.e. correctly), either there’s a lot of wiggle room above your foot, or the top of the inside of the boot crushes the top of your foot, then again, these aren’t the boots for you.
Ankle width - Your ankle should be held in place securely by the boot, and the fit should be snug. The ankle, however, is a location which is particularly prone to pressure points, so be wise to this. Remember that you’re going to be wearing these boots for the whole day, day after day, so like any pair of shoes, they mustn’t cause you pain.
Lower leg (cuff) shape - The boot’s cuff needs to conform accurately to the shape of your lower leg, and specifically your shin. You’ll find that some boots do this perfectly and naturally fit the curvature of your foot up to your shin, while other boots will feel weird, and the tongue of the boot will curve in a way which won’t work for you. Pay close attention to how the boot feels on your lower leg, and trust your judgment.
And really, that’s all there is to it. Try on as many different boots as you can, and eventually you’ll likely find a pair which will fit you well. It may take a while, but the time that you invest in finding the perfect boots will pay dividends.
“Importantly, the one thing I would advise is that you do put specialist footbeds of some kind in your new ski boots. This is because the basic footbeds that come with all new boots are not fit for purpose in my opinion, and are usually almost flat, offering very little arch support.”
Some final thoughts
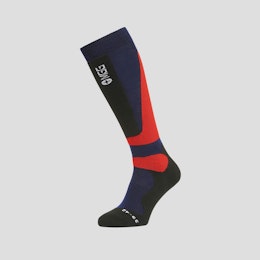
Always try on ski boots while wearing the exact same ski socks that you’ll be wearing when you ski. Buy high quality ski socks in advance that fit you perfectly, and take them with you to the fitting.
Sometimes an individual might have an oddly shaped foot, possibly because of an injury. As a result, it may well be that there won’t be one single boot that doesn’t have at least a small pressure point somewhere and, if so, a good ski shop should be able to adapt the boots by ‘punching’ them, which means slightly adjusting the shape of the boot using force and heat, to remove the pressure point. This is entirely acceptable. However, what’s not acceptable is for you to try on a pair of boots, for you to find a slight pressure point, and then for the boot fitter to suggest punching them to make them fit! If you have feet which are roughly normal in shape, then it should usually be possible to find a pair of ski boots which will fit you, without any pressure points. Punching boots should only ever be a last resort, and often it doesn’t even work very well anyway.
Custom footbeds are a subject on which I could write another whole article! Ski shops will regularly try to up-sell you expensive custom-made footbeds to go with your new boots, which are created on the spot for you. These can set you back us much as an additional £150! For some people who have an unusually shaped foot arch, I can see why custom footbeds might work well. Personally, however, I’ve always found that off-the-shelf ski boot footbeds, such as those made by Superfeet, work just as well for me. The most important thing is that you choose the correct footbeds which will adequately support the arch of your foot, and which are specifically designed for ski boots. You may need to buy a couple of different footbeds, to find the ones that work best for you. Importantly, the one thing I would advise is that you do put specialist footbeds of some kind in your new ski boots. This is because the basic footbeds that come with all new boots are not fit for purpose in my opinion, and are usually almost flat, offering very little arch support.
If, like many ski boots these days, the pair that you eventually settle on can be heat moulded, then you should absolutely make the most of this feature. Usually either for free as part of your purchase, or for a small extra fee (£20-30), you can ask the boot fitter to heat your boots in their on-site ski boot oven (which is definitely preferable to doing so at home, which I wouldn’t recommend). And, if the boot fitter (hopefully) knows the boots that they’re selling, they should be able to assist and advise on the moulding process for your particular pair of boots, which can differ slightly from brand to brand. Once done, don’t expect them to magically feel ergonomically incredible, but heat moulding is definitely worth the small amount of extra comfort that it can bring.
A word of warning for those buying their first pair of ski touring boots. If you’re buying a pair of touring skis + bindings to go with your new touring boots, be very careful that your new bindings are compatible with the soles of your new boots. There are three types of touring boot soles that you regularly see: WTR (Walk to Ride), Gripwalk and Touring. Predictably, they were developed by different brands, and there are compatibility issues between different boot sole types, and different touring bindings. It’s too complicated to explain here what goes with what, but you can click HERE if you want to learn more.
And lastly, before you actually ski for the first time in your new boots, I’d highly recommend that you put them on at home, do up all the buckles, and then wear them for a couple of hours at a time while watching the television, doing chores around the home, or similar. If you go out skiing in a pair of brand new boots which you’ve never worn before, they can often be a little tight and firm in the flex. By wearing them in advance around the house, like any pair of shoes, you’ll start to wear them in, and you’ll thank me for it when you finally hit the slopes. It’ll then take a number of days of skiing for your new boots to fully wear in (probably 5 to 10 full days), so be patient.